  | This is a field of Pixel Pipes I made to go on my grass this year. I am making 33 of these pipes, with 5 pixels each, consuming just under 1 full universe.
Layout:
1 1 1 1 1 1 1
2 2 2 2 2 2
3 3 3 3 3 3 3
4 4 4 4 4 4
5 5 5 5 5 5 5
|

  |
Special Materials needed:
Pixels:
http://www.holidaycoro.com/product-p/673.htm
PixNode Strips:
http://www.holidaycoro.com/product-p/767.htm
This is a similar design to David Peace, but he used coro instead of PVC. He was on The Great Christmas Light Fight in 2017. His video showing layout and testing is here
 | For this build, I used 1 Inch PVC pipes from the hardware store. This size is just big enough to feed the flat style pixels though the tubes. I cut the PVC into 20 Inch sections. This would give enough room for 5 pixels per, and some space left over for the wiring and diagonal cut to make it easier to push into the grass. |
 | Next I marked the PVC Pipes for cutting. A line at the 2 Inch mark will be for the top of a PixNode Strip. |
 | Next I marked at 15 Inches, as this will be the bottom. This is 13 inches, so it will be 13 holes of PixNode Strip. The idea is to use the PixNode Strip for 4 nodes, and one node on the top of each pipe. |
 | Cut with a jigsaw. This is difficult with a portable jigsaw, as you have to be careful not to twist the pipe, and maintain the depth. The slot has to be wide enough for the pixel node to slide into the pipe. |
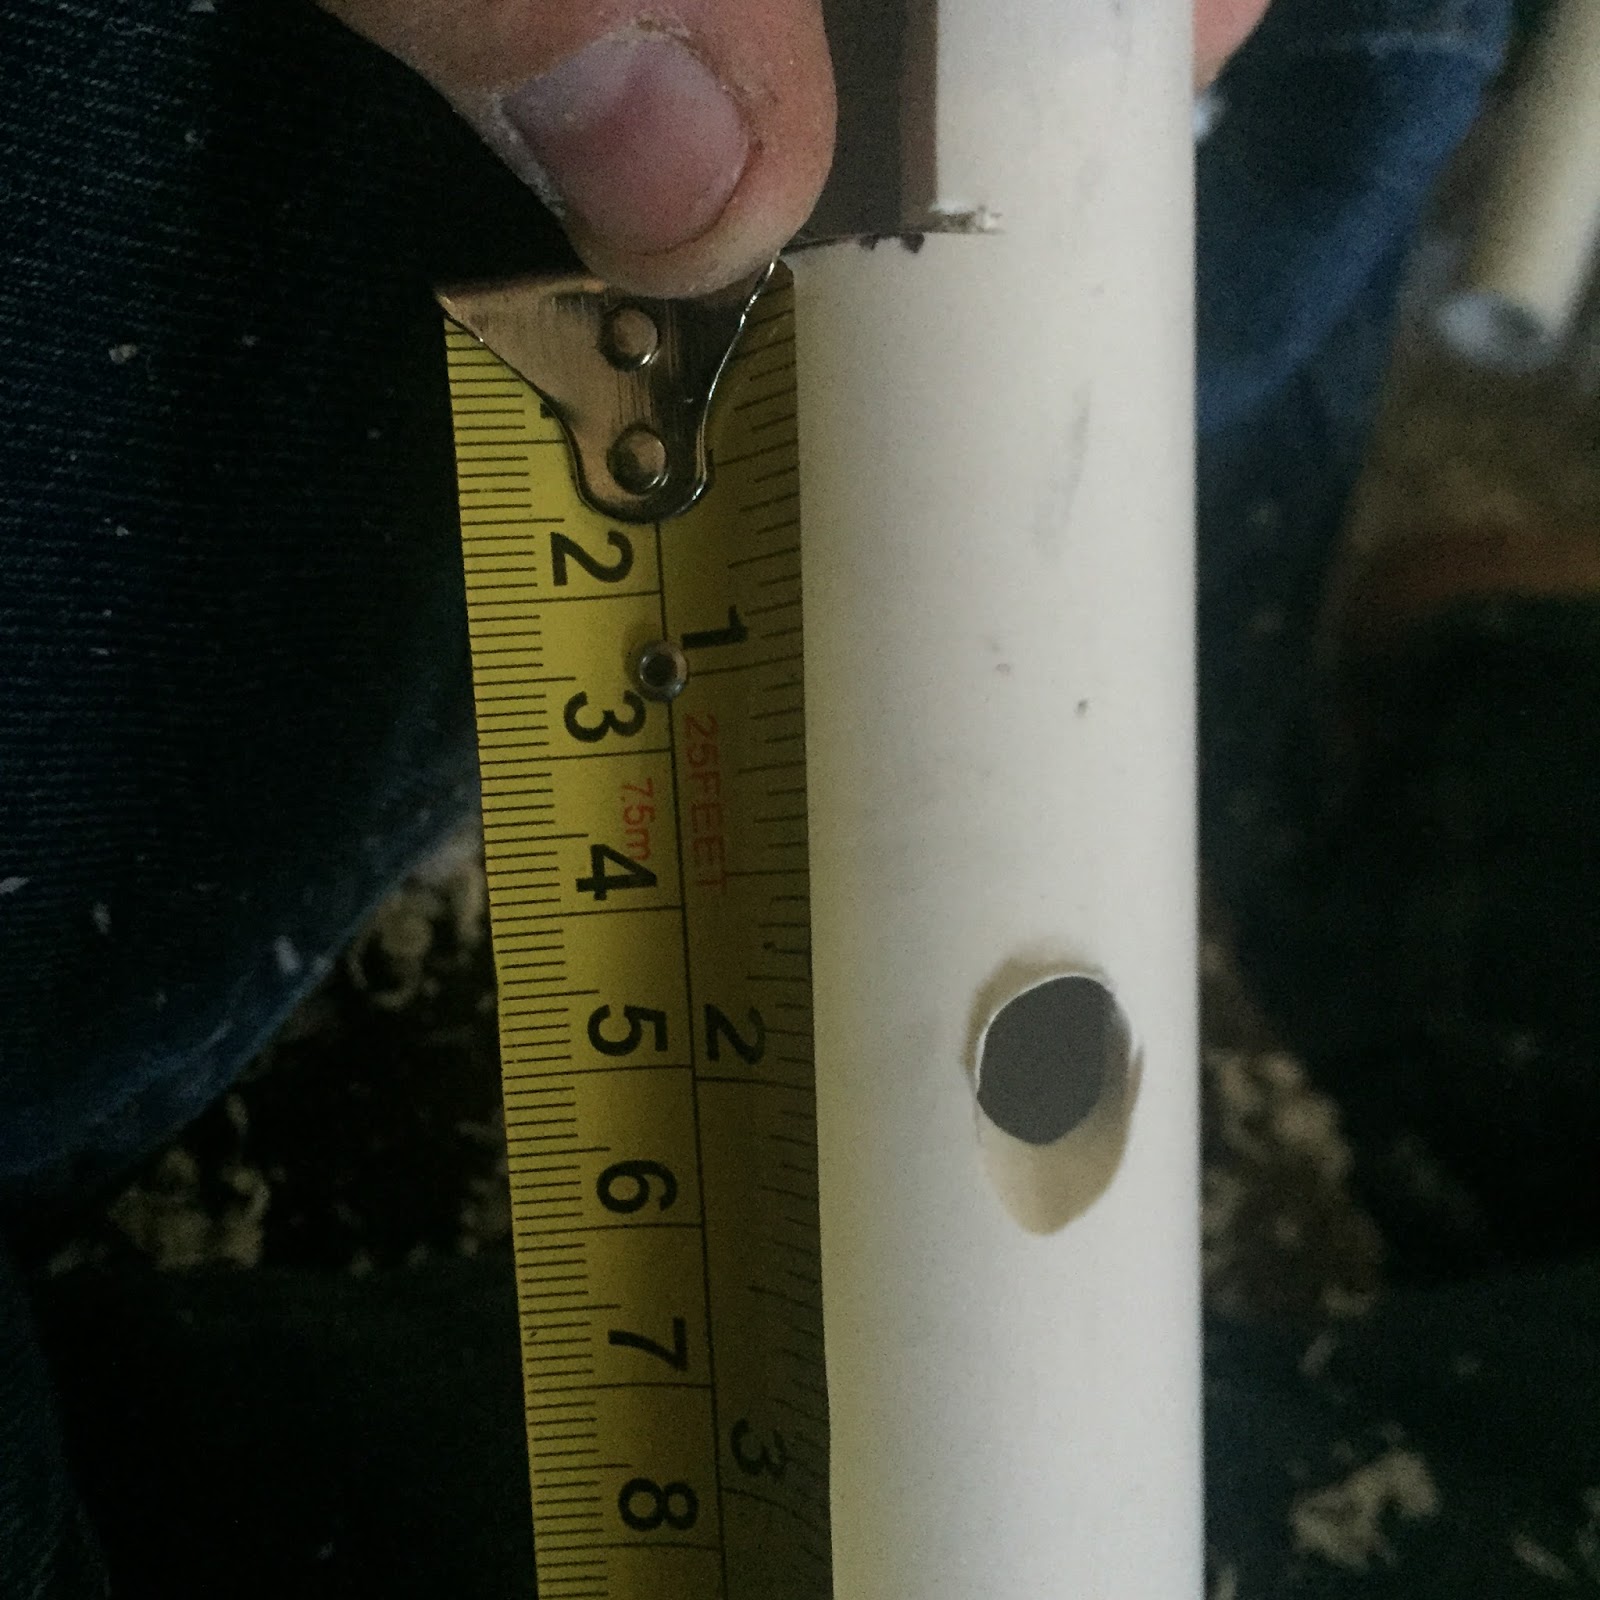 | Drill holes about 2 inches below the bottom cut (the one at 15 inches from the top), as this will be for the wiring. |
 | Once the pipes are cut, it is time to start on the wiring. I wanted a 4 foot space between each pipe, so that came out to about 5.5 feet of wire between each one (1.5 feet to travel up the next pipe and attach to the top pixel). This is the cable I found at my local hardware store, at $.63/foot. I attached my cable tails to the output side of my PixNode Strips. |
 | Next, assemble the section of PixNode Strip with lights attached. Make sure you see the direction of your data on the pixels. I went from the Top down, so the one pixel not on the PixNode Strip was the one receiving data and on the top of the pipe. I used a hot glue gun to attach the PixNode Strip to the PVC, and that seems to work out well. I used the 1 Inch center to center spacing PixNode Strips, but I could have done the same build using the 3 Inch center to center spacing. Don't touch the glue gun to the PixNode Strip for too long, as it will start to melt the PixNode Strip. |
 | The PVC is the perfect size to gently hold a pixel at the top. Now, to make the cap. |
 | I used a jigsaw to cut a flat top on the end cap. This will make it easier to get the pixel node settled, and reflect some of the light so it will be more visible. Once you have drilled and sized the hole on the end cap, I wet the inside of the cap, and pushed to onto the PVC tube. You may need to move the pixel into place, but once it is aligned, a firm push on the cap onto the pipe should push the pixel into place. |

| Next is to build more, and test. I did use some connectors to I can disconnect sections. I did sections of 3 and 4 pipes. This allowed me the flexibility to relocate sections if needed. The last thing to do is mask the pixels off with tape, and spray paint the pipes black, so they will not be visible unless they are lit up. |
 | This is my 1/2" PVC test jig that I used for testing the effects on the pipes. Later, I replaced the sections of pipe between the T fittings to extend the size of the whole unit, so I could use the Pixel Pipes for an indoor show. I recommend either electrical taping the pipes, or painting them black if used indoors. |


